随身wifi折腾日记

最近折腾了好久的随身wifi,0.5+4 的配置 18块,当作学习linux 的工具还是可以的

我在逸夫楼有工位,逸夫楼能免费使用校园网且24小时不断电
思路是从wifi棒的局域网->校园网的局域网下->内网穿透绑定域名
前期准备 wifi棒 armbian文件 域名一个 cloudflare账号
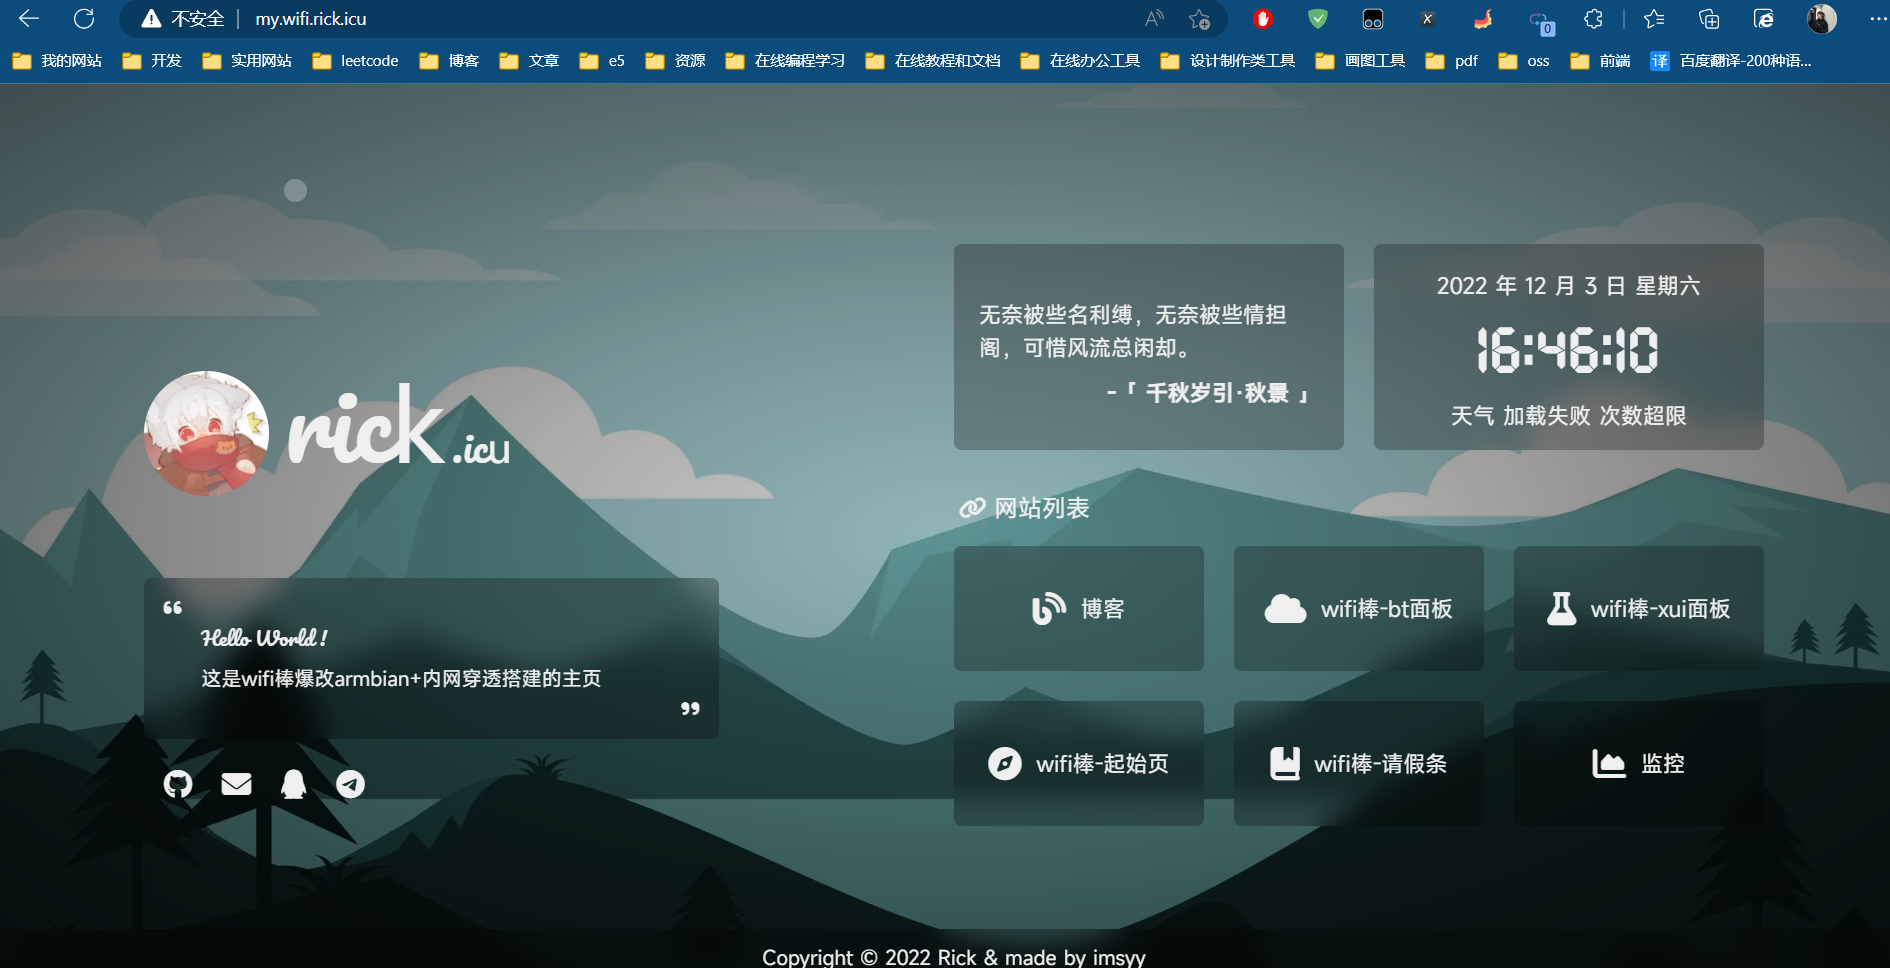
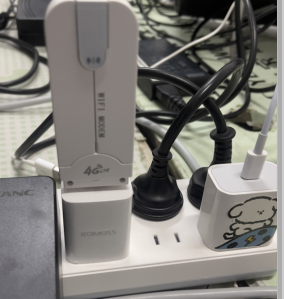
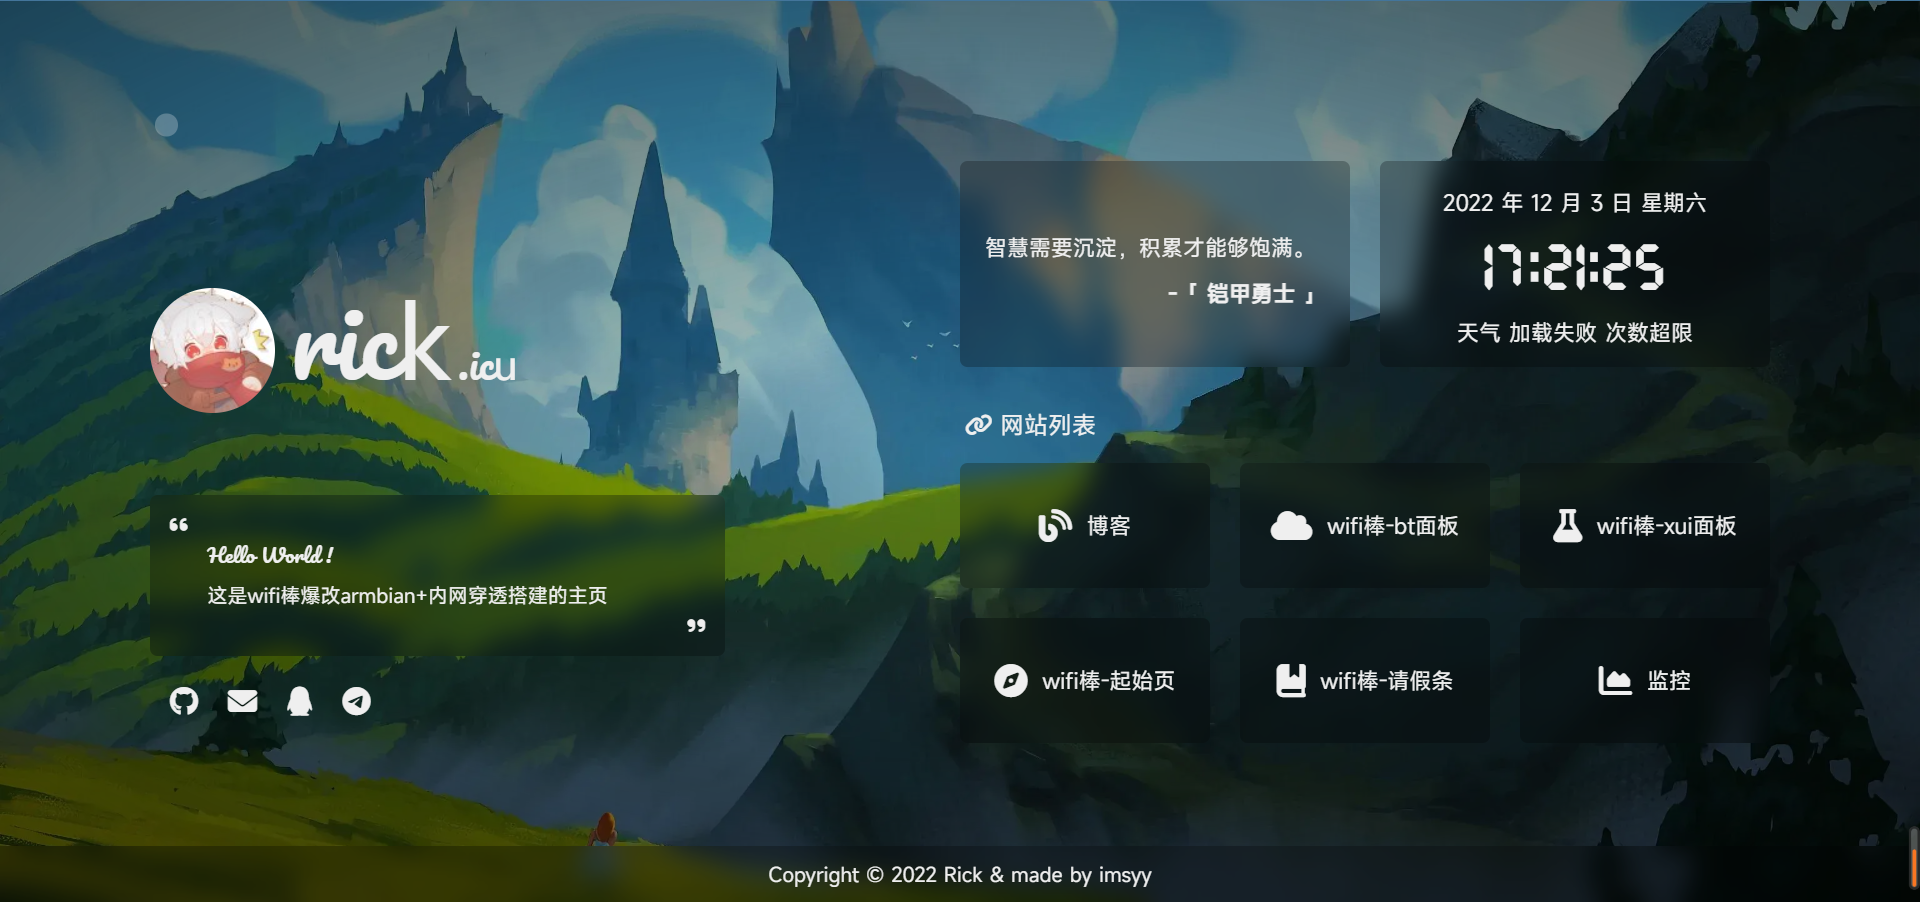
成品图:

刷入armbian
链接:https://pan.baidu.com/s/1uk-sPXzLqiSDKQchahzn8A?pwd=ebm7
提取码:ebm7
1.安装好miko 9008 免驱动
将棒子插入电脑,安装好miko 9008 免驱动等文件
2.进入fastboot
打开cmd输入
adb reboot bootloader3.刷入armbian系统
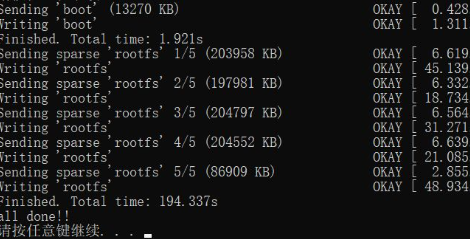
进入文件夹,双击flash.bat
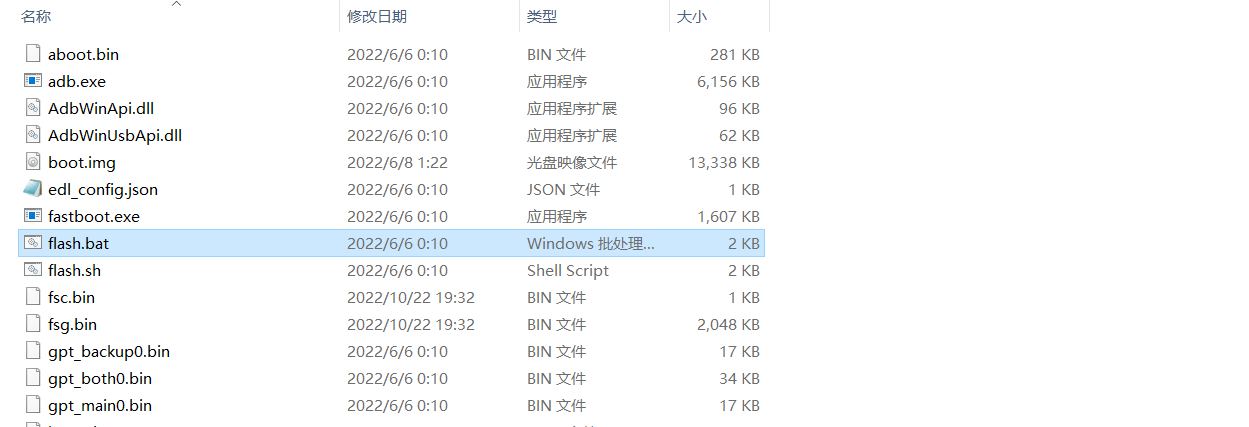
等待刷入完成
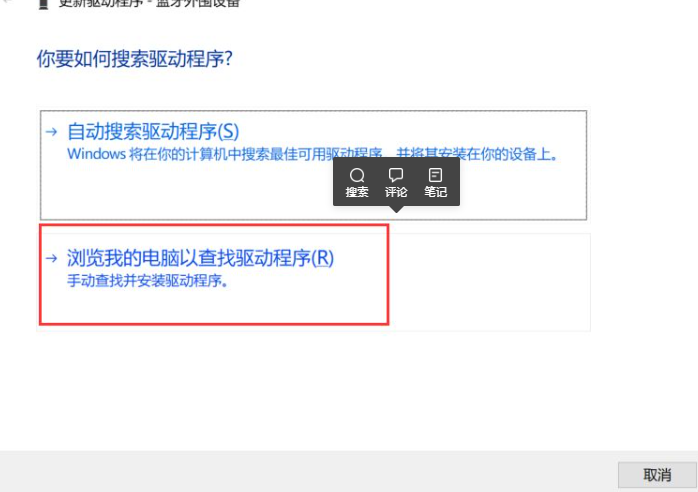
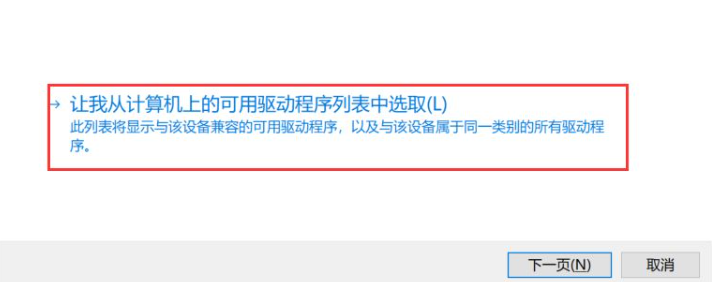
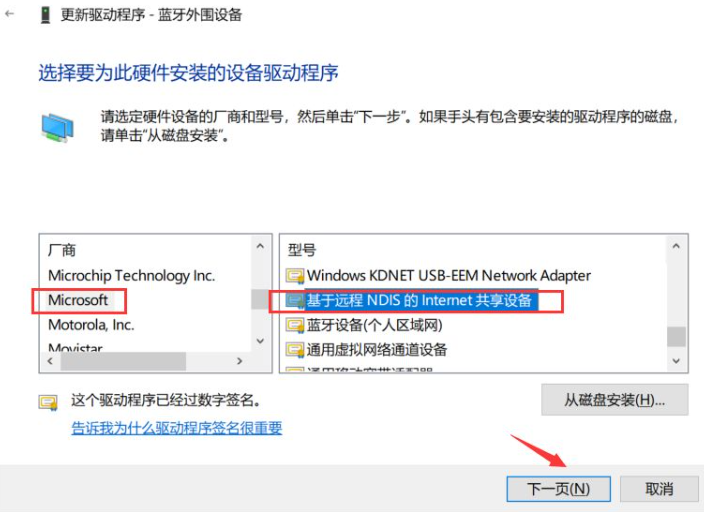
4.RNDIS
刷机完毕后,重新插拔下,会有一个RNDIS或未知设备,右键更新驱动,自定义选择基于远程NDIS的internet共享设备
ssh连接armbian
思路是从wifi棒的局域网->校园网的局域网下
1.进入系统
ssh root@192.168.68.1 192.168.68.1 user 密码1 sudo -i 密码1到root权限
2. 编辑网络
编辑链接进入网桥
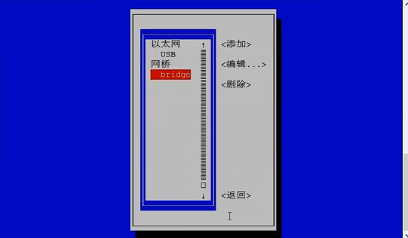
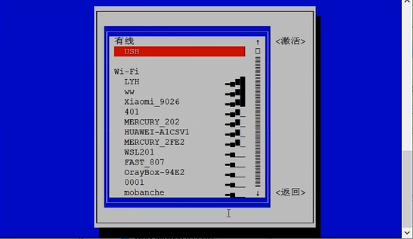
将wifi设备删除
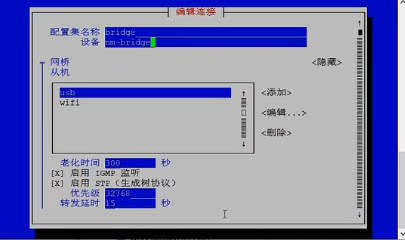
然后启用连接,链接wifi
3.查看ip
ifconfig 查看校园网下wifi棒地址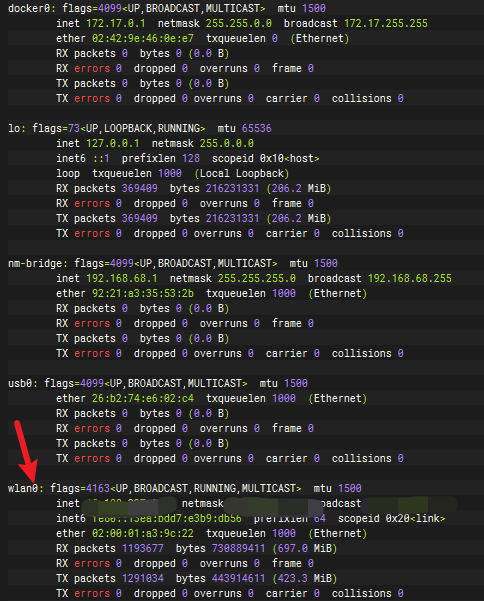
4.独立供电
从电脑拔下wifi棒,单独插在插座
然后电脑ssh链接wifi棒
ssh root@ip地址 注意电脑,wifi棒都需要在ihnust 下
5.设置语言
apt-get install locales
dpkg-reconfigure locales
安装x-ui,docker
apt-get update #更新源
apt install curl wget #安装wget和curl工具
1.安装xui
bash <(curl -Ls http://gm.zhoudedi.top:41/x-ui/install.sh)2.安装docker
不推荐安装 ,0.5 +4 内存太小
curl -fsSL https://get.docker.com | bash -s docker --mirror Aliyun #安装docker
systemctl enable docker
systemctl start docker
安装aapanel
Centos :

yum install -y wget && wget -O install.sh http://www.aapanel.com/script/install_6.0_en.sh && bash install.sh forum

The experimental Centos/Ubuntu/Debian/Fedora installation command supports ipv6. Note that this command is executed with root privileges (Centos8 is supported)

curl -sSO http://www.aapanel.com/script/new_install_en.sh && bash new_install_en.sh forum

Ubuntu/Deepin :

wget -O install.sh http://www.aapanel.com/script/install-ubuntu_6.0_en.sh && bash install.sh forum

Debian :

wget -O install.sh http://www.aapanel.com/script/install-ubuntu_6.0_en.sh && bash install.sh forum
1.一键安装
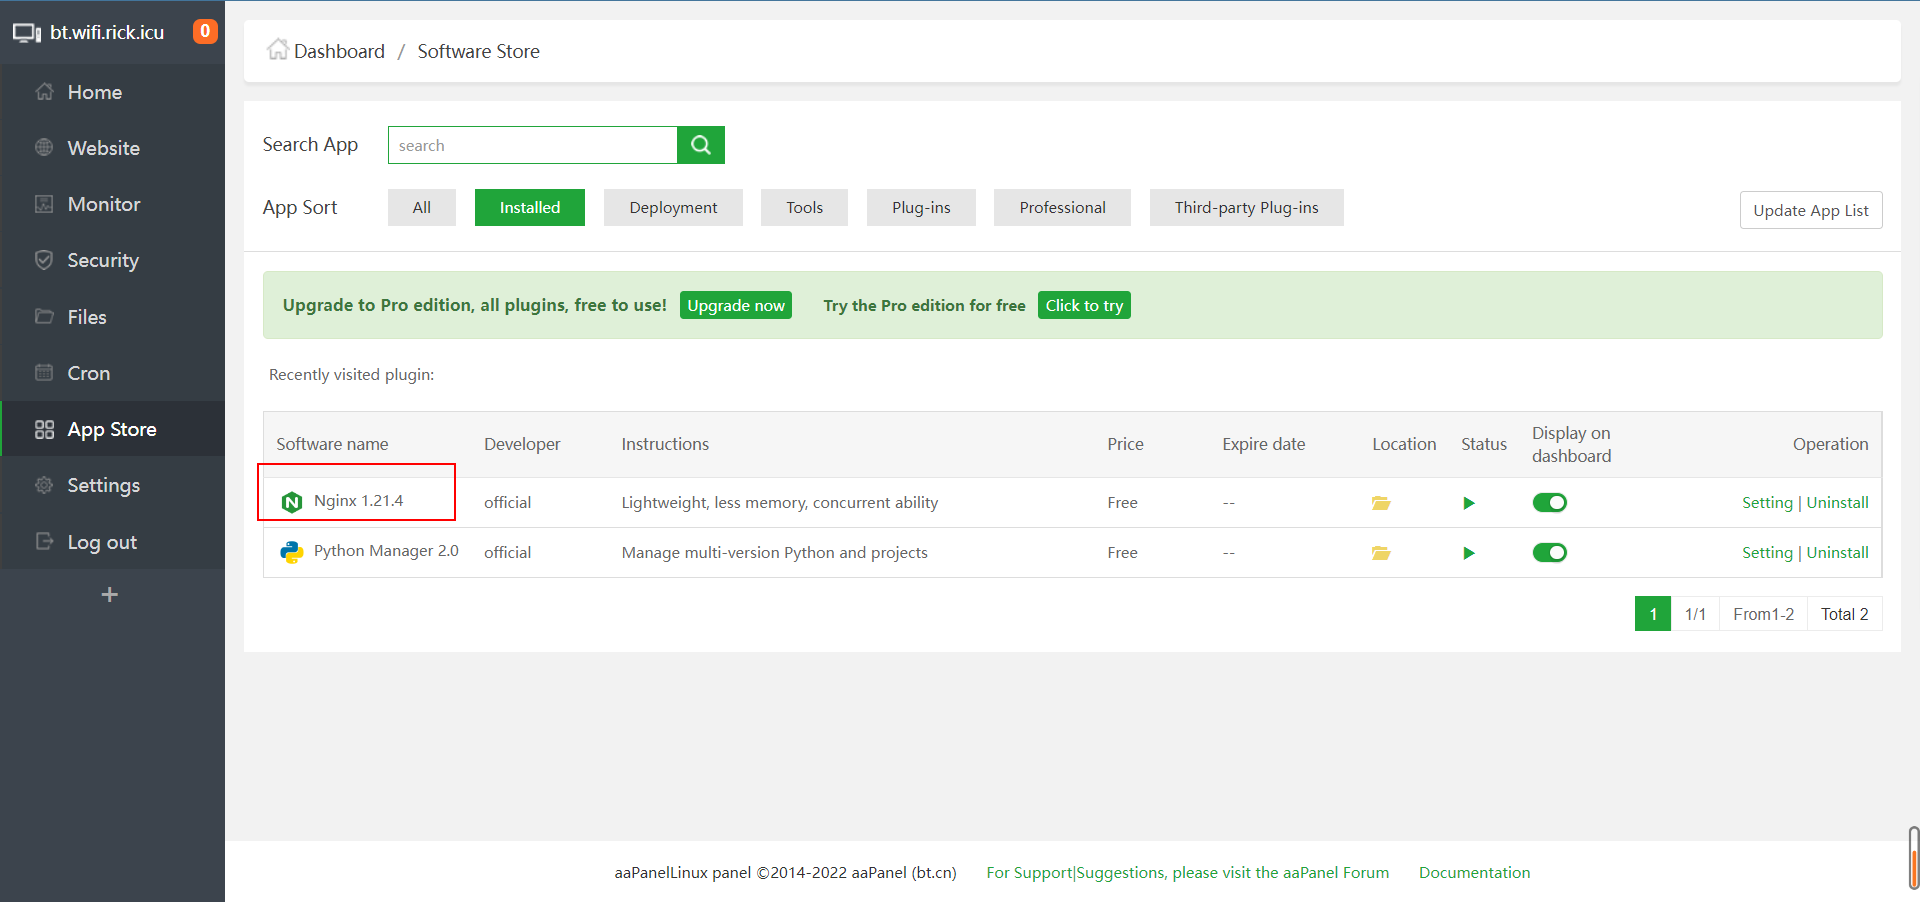
wget -O install.sh http://www.aapanel.com/script/install-ubuntu_6.0_en.sh && bash install.sh forum2.安装nginx
ssh输入bt 可以查看地址,用户名,密码

浏览进入就可以了,应用商店找到nginx 安装
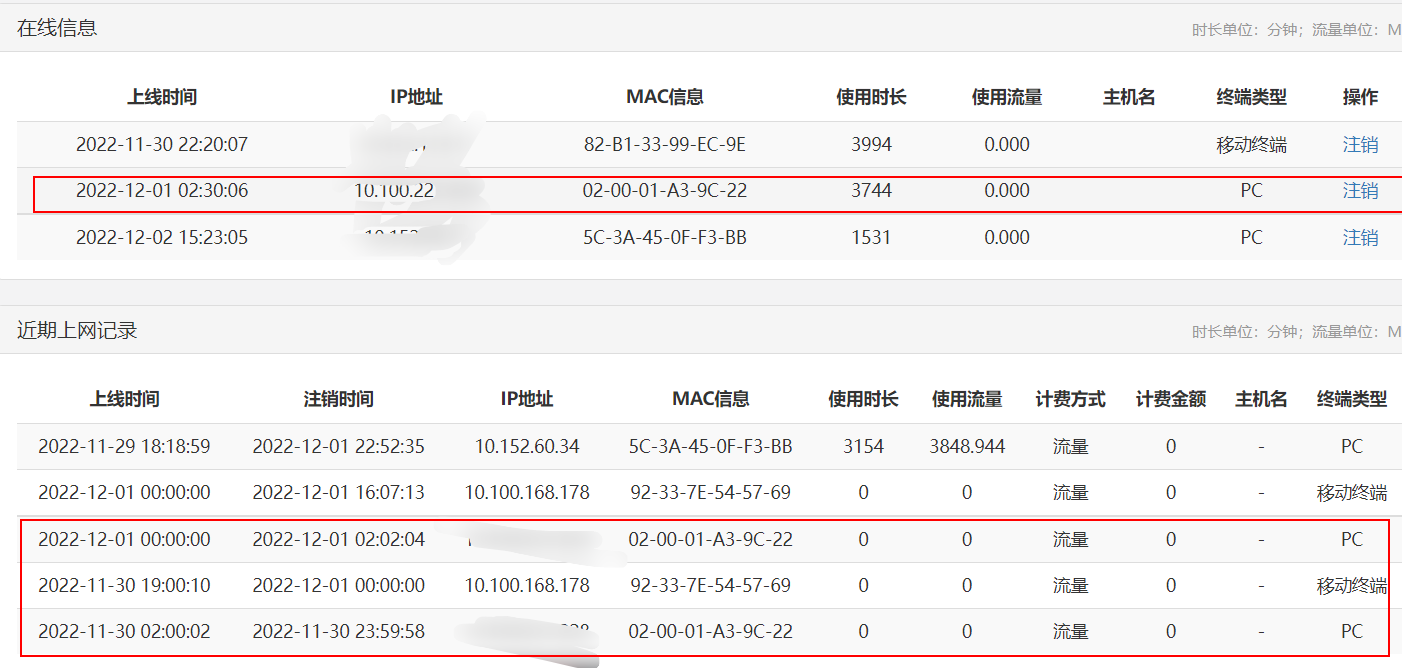
自动登录校园网
摸索下,好像不能设置固定IP,所以只能采用此办法,通过定时脚本登录
1.抓包校园网
http://login.hnust.cn:801/eportal/?c=Portal&a=login&callback=dr1004&login_method=1&user_account=%2C0%2C你的学号&user_password=你的密码&wlan_user_ip=你的ip&wlan_user_ipv6=&wlan_user_mac=000000000000&wlan_ac_ip=&wlan_ac_name=&jsVersion=3.3.3&v=46692.定时执行
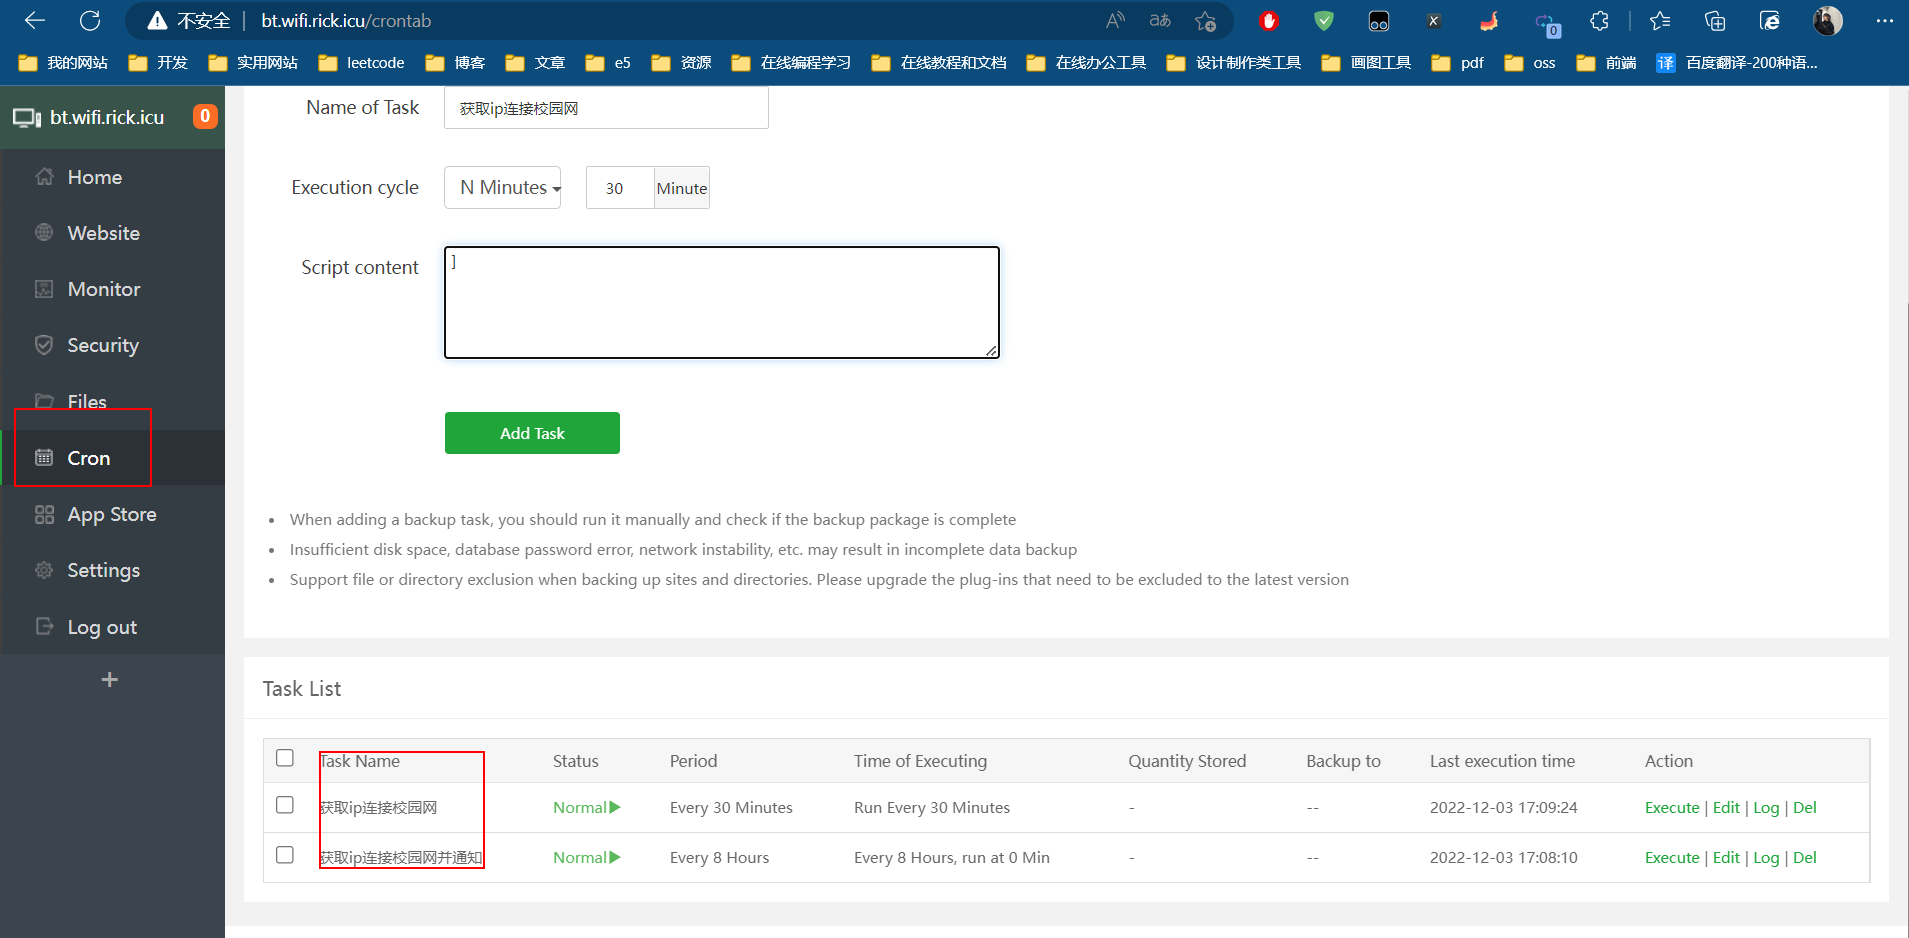
代码如下,一般30min执行一次就够了
#!/bin/sh

ip=$( ifconfig |grep inet|grep -v docker0|grep -v 127.0.0.1|grep -v inet6|grep -v 19|grep -v 172|awk '{print $2}'|tr -d "addr:")

curl -s "http://login.hnust.cn:801/eportal/?c=Portal&a=login&callback=dr1004&login_method=1&user_account=%2C0%2C学号&user_password=密码&wlan_user_ip="$ip"&wlan_user_ipv6=&wlan_user_mac=000000000000&wlan_ac_ip=&wlan_ac_name=&jsVersion=3.3.3&v=4669"
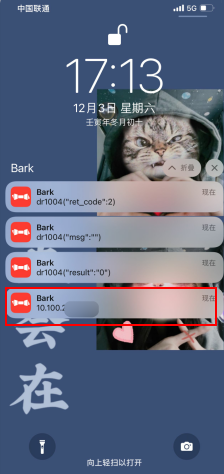
也可以自己抓包试试,登录校园网就不在详述,值得一提的是bark通知最新ip地址
部署网站
1.建立网站
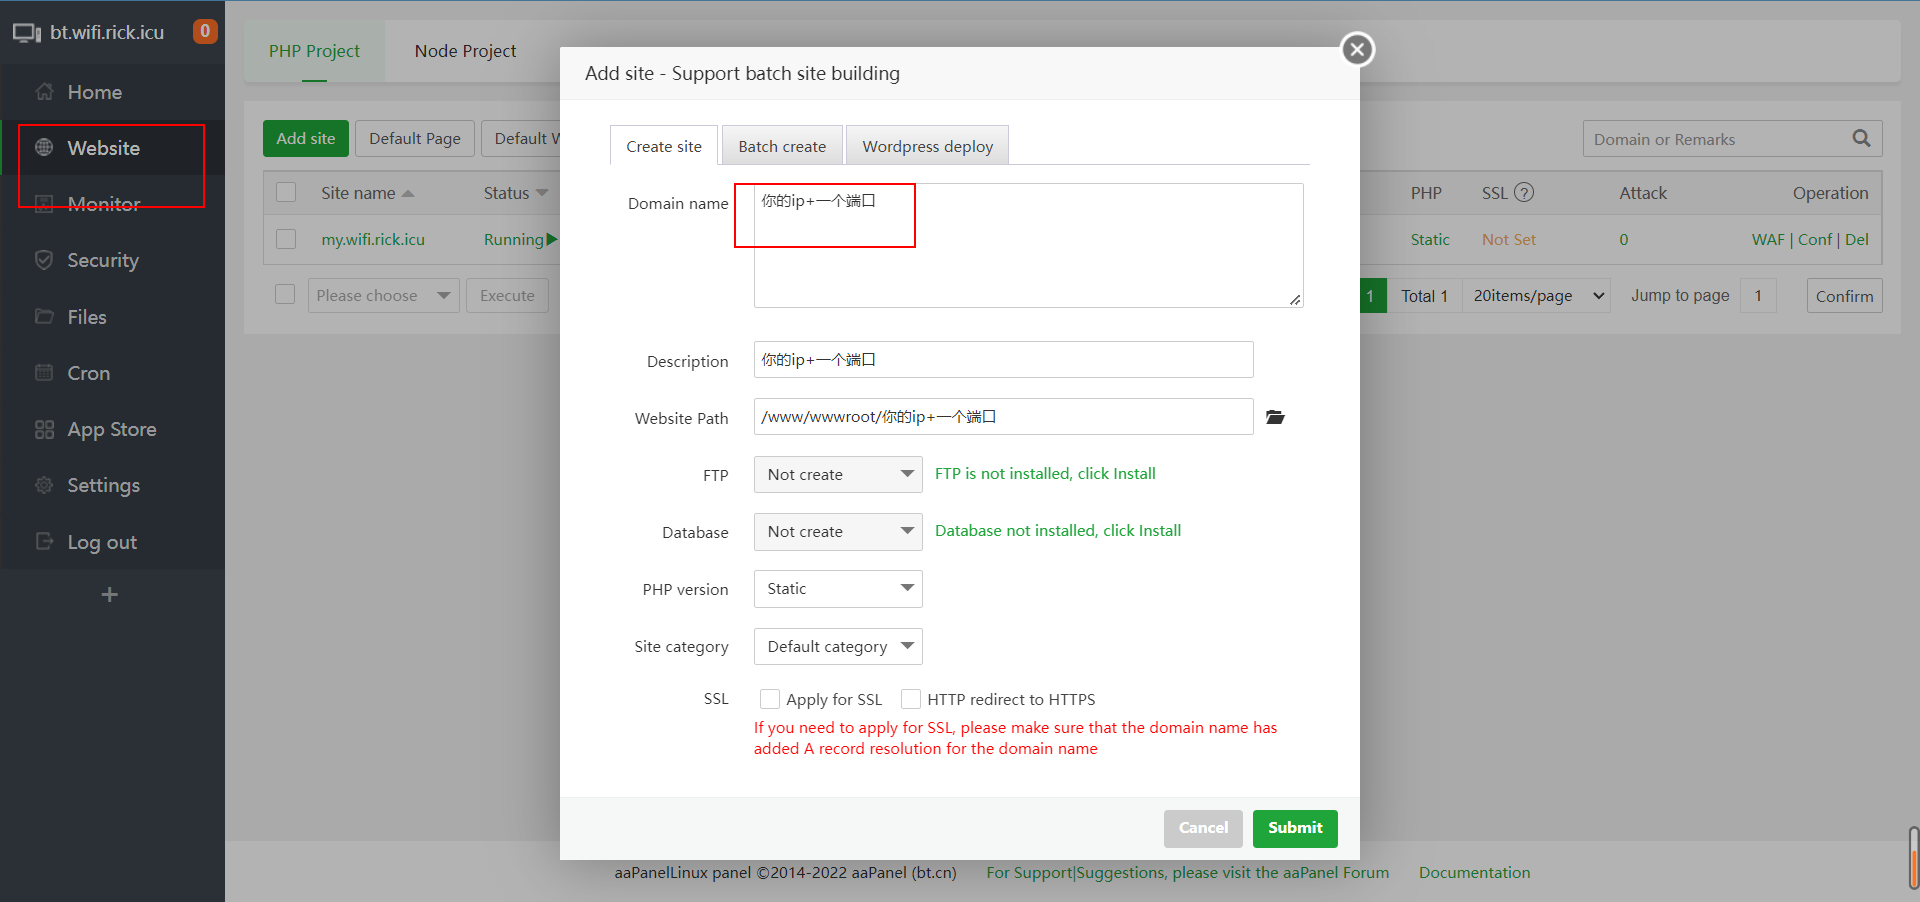
!!!!!! 这个在内网穿透要用
2.上传文件
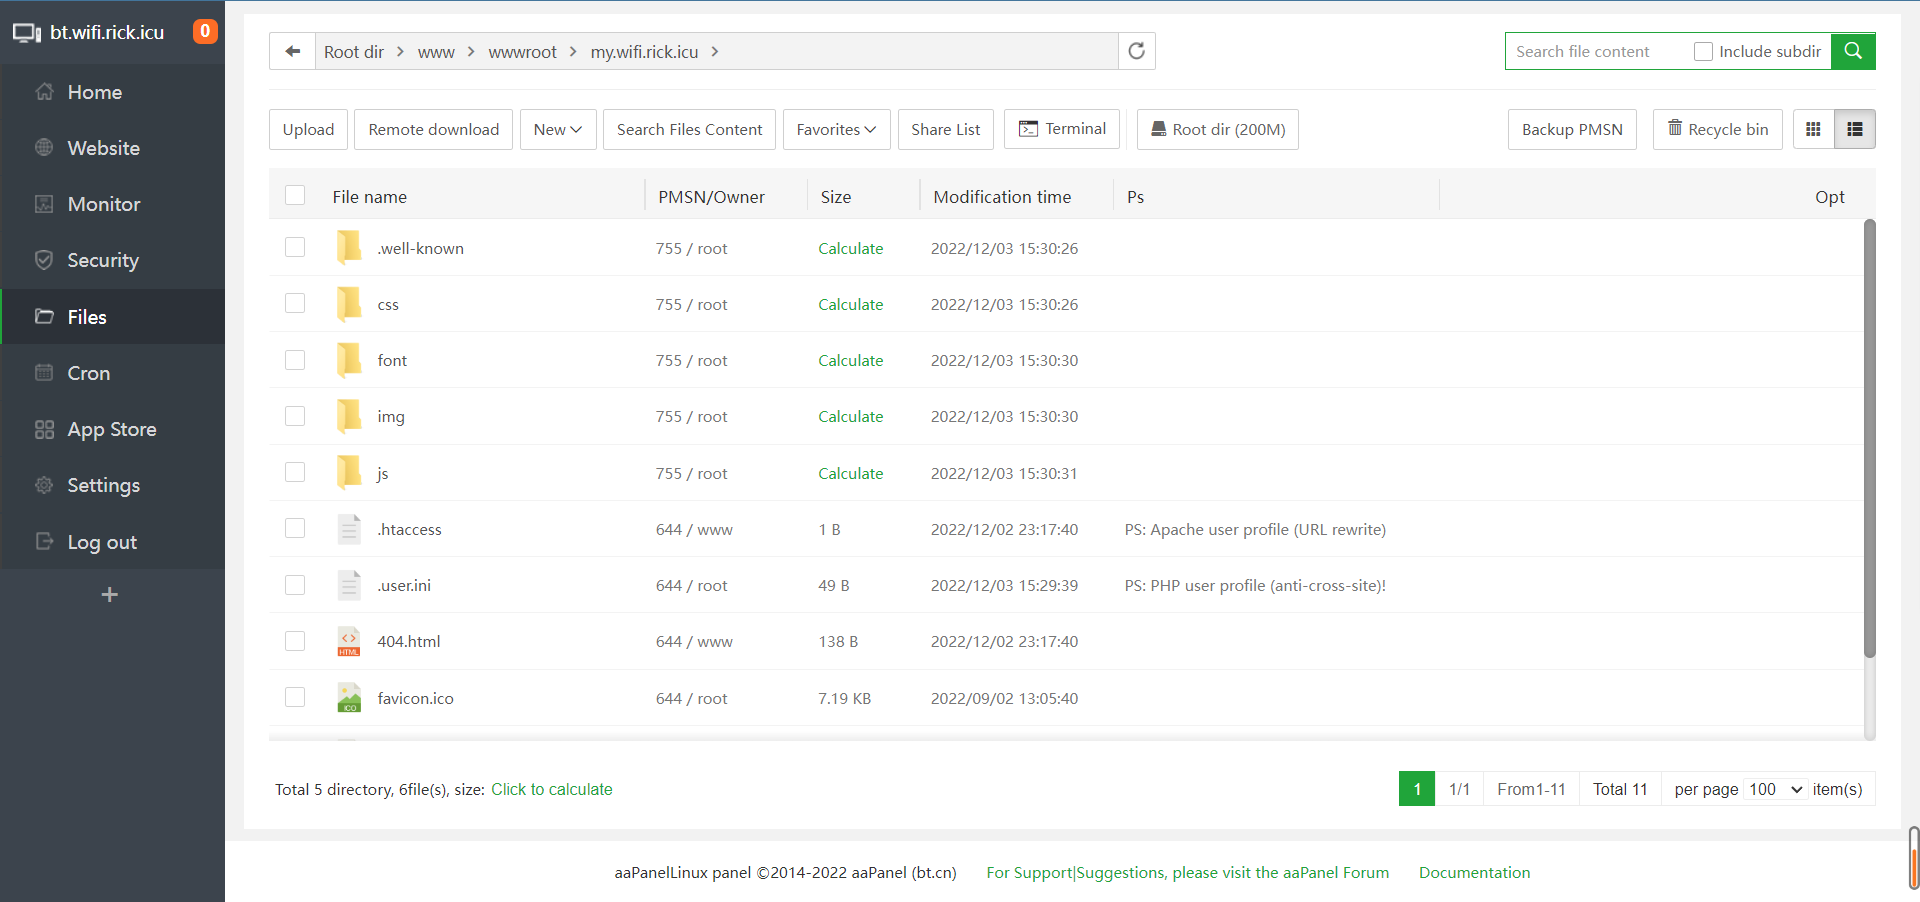
3.效果图
打开就能看到
cloudfare内网穿透
思路是从校园网的局域网下->内网穿透绑定域名 ,就不用记ip,也不怕ip会换
然后你说为啥不ipv6+ddns 我们学校无ipv6.....
1.安装cloudflared
选择debian arm64 版本
https://github.com/cloudflare/cloudflared/releases/latest/download/cloudflared-linux-arm64.deb建议电脑下载好,传入wifi棒
2.登录 Cloudflared
cloudflared tunnel login 这时会弹出来一个URL,用浏览器打开,登录成功后关闭浏览器,再次打开URL,这时候会出现授权 页面,然后选择你想用来做内网穿透的域名授权即可。
成功后会生成证书,放置于~/cloudflared/cert.pem中。3、建立隧道
cloudflared tunnel create <隧道名称>例子:cloudflared tunnel create rick
成功后会提示,相关凭证已放置于~/.cloudflared/<Tunnel-UUID>.json中。
cloudflared tunnel list
验证隧道是否建立成功,同时复制隧道ID4、新建 Tunnel 对应的 DNS 记录
| Service | Description | Example service value |
|---|---|---|
| HTTP/S | 常规网页服务 | https://localhost:80 |
| TCP | TCP连接 | tcp://localhost:2222 |
| SSH | SSH 连接 | ssh://localhost:22 |
| RDP | RDP 远程桌面 | rdp://localhost:3389 |
<域名>填你想用来做内网穿透的域名

cloudflared tunnel route dns <隧道名称> <域名>
例子:cloudflared tunnel route dns wifi my.wifi.rick.icu
成功后会创建CNAME记录将域名指向隧道,回到Cloudflare网站,点击域名,点击左边的DNS,能看到出现一条新的CNAME的DNS记录,此时证明解析成功。5、新建配置文件
vim ~/.cloudflared/config.yml #写入以下配置
!!!就是之前的网站
tunnel: <隧道ID>
credentials-file: /root/.cloudflared/<隧道ID>.json
protocol: http2
originRequest:
 connectTimeout: 30s
 noTLSVerify: false
ingress:
 - hostname: <域名>
  service: http://localhost:<端口号>
 - service: http_status:404
cloudflared service install6、启动Cloudflared并且让 Cloudflared自启动
#修改systemd文件
nano /etc/systemd/system/cloudflared.service #写入以下内容
[Unit]
Description=cloudflared
After=network.target

[Service]
TimeoutStartSec=0
Type=notify
ExecStart=/usr/bin/cloudflared --loglevel debug --transport-loglevel warn --config /root/.cloudflared/config.yml tunnel run <隧道名称>
Restart=on-failure
RestartSec=5s

[Install]
WantedBy=multi-user.target #启动 Cloudflared
systemctl enable cloudflared --now
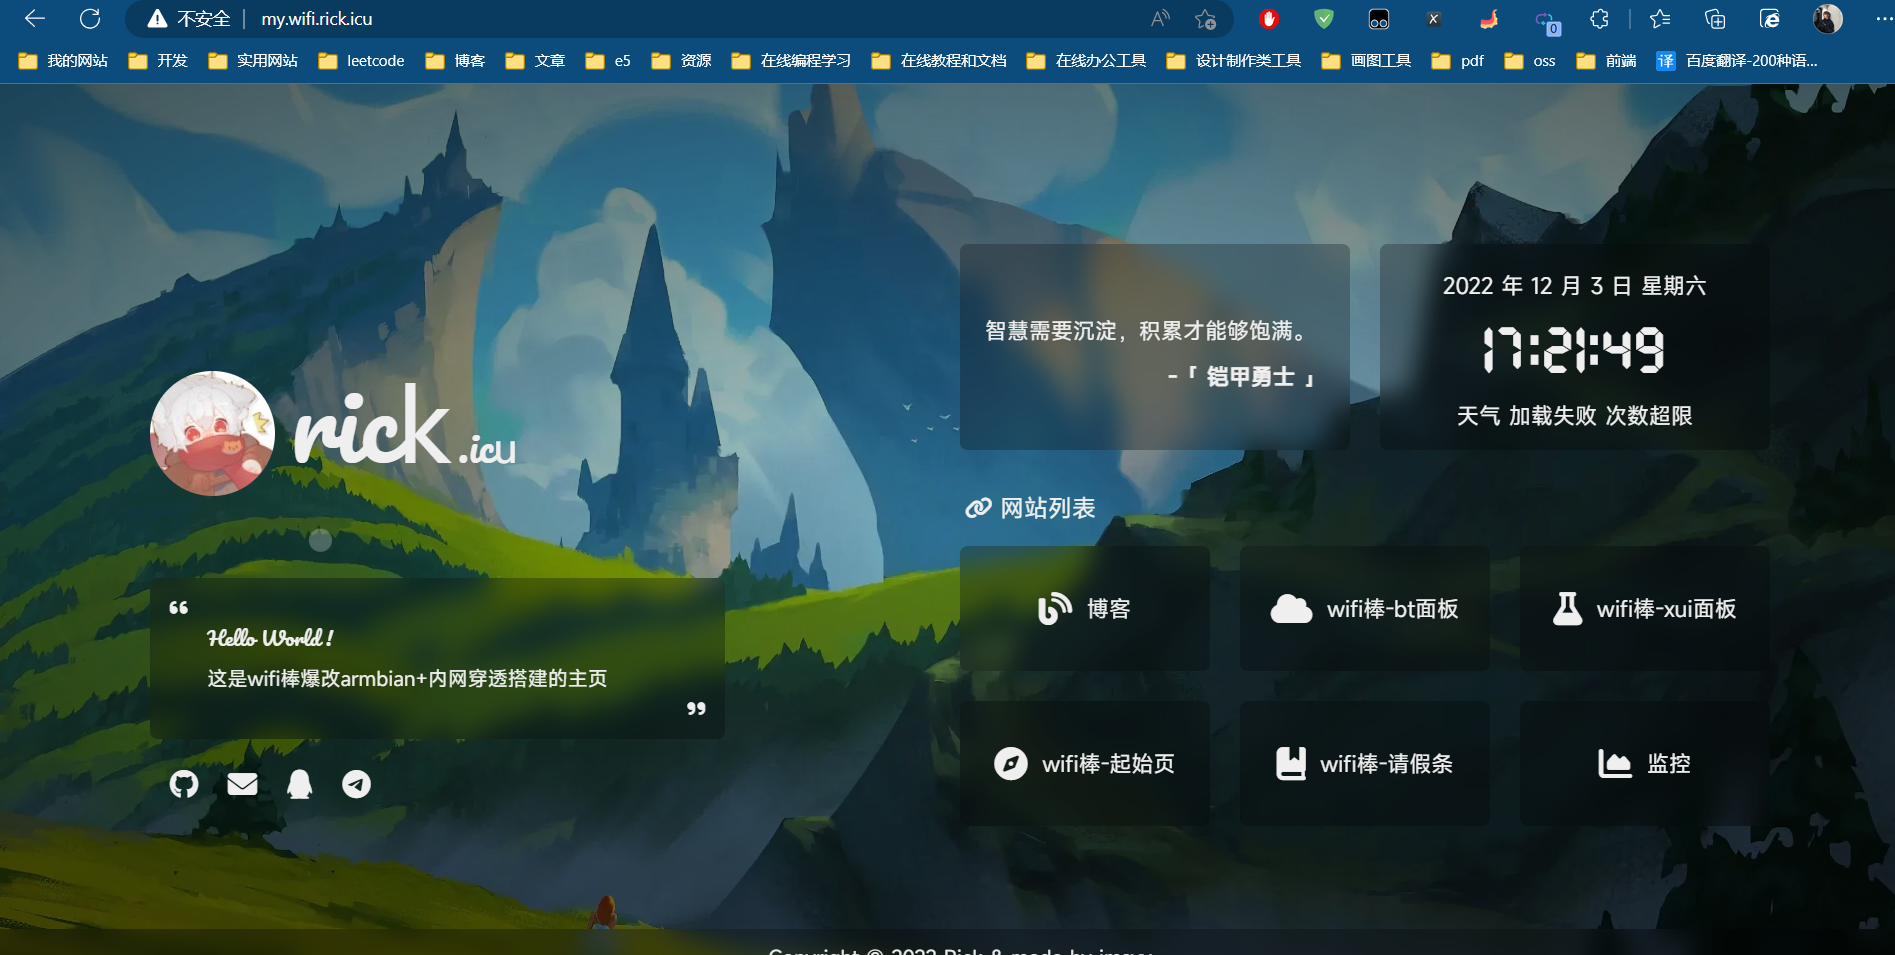
systemctl restart cloudflared 7、测试穿透是否成功
等待一两分钟,然后尝试访问域名,如可正常显示则成功。
Comments 13 条评论
大佬链接过期了,可以提供一份新的链接么。
@MM 复制这段内容后打开百度网盘App,操作更方便哦。 链接:https://pan.baidu.com/s/1uk-sPXzLqiSDKQchahzn8A?pwd=ebm7 提取码:ebm7
@rick 大佬,我也想刷机学习一下,资源又过期啦,求再分享一下
@孜然尘封 hi,这是我用百度网盘分享的文件~复制这段内容打开「百度网盘」APP即可获取。
链接: https://pan.baidu.com/s/1TmDJazoFIA-DfW_tL6uvoQ?pwd=kr34
提取码:kr34
@MM hi,这是我用百度网盘分享的文件~复制这段内容打开「百度网盘」APP即可获取。
链接: https://pan.baidu.com/s/1TmDJazoFIA-DfW_tL6uvoQ?pwd=kr34
提取码:kr34
网盘链接失效了 可以补发吗?
@Jaky hi,这是我用百度网盘分享的文件~复制这段内容打开「百度网盘」APP即可获取。
链接: https://pan.baidu.com/s/1TmDJazoFIA-DfW_tL6uvoQ?pwd=kr34
提取码:kr34
你好,百度云链接又过期了555
@1 hi,这是我用百度网盘分享的文件~复制这段内容打开「百度网盘」APP即可获取。
链接: https://pan.baidu.com/s/1TmDJazoFIA-DfW_tL6uvoQ?pwd=kr34
提取码:kr34
连接过期了,再给个连接吧,能发邮箱最好了
@w45sen hi,这是我用百度网盘分享的文件~复制这段内容打开「百度网盘」APP即可获取。
链接: https://pan.baidu.com/s/1TmDJazoFIA-DfW_tL6uvoQ?pwd=kr34
提取码:kr34
我按教程配置config.yml,不起作用,但是在Tunnels,configure,Public Hostname设置了就可以起作用。
@w45sen 我这是官网的,可能官网有变化?